Styles / Digital & social
Purikura photo-sticker booth
- Key: a flash on the camera, about 25° to the camera’s left, soft.
- Fill: a softbox, about 25° to the camera’s right, high, soft.
Shadowless: big sources close in on both sides (or a light tent, or a white cove) so nothing casts a shadow.
Schematic, not to scale: worked out from the style’s choices. No set-up of this style has been rendered yet.
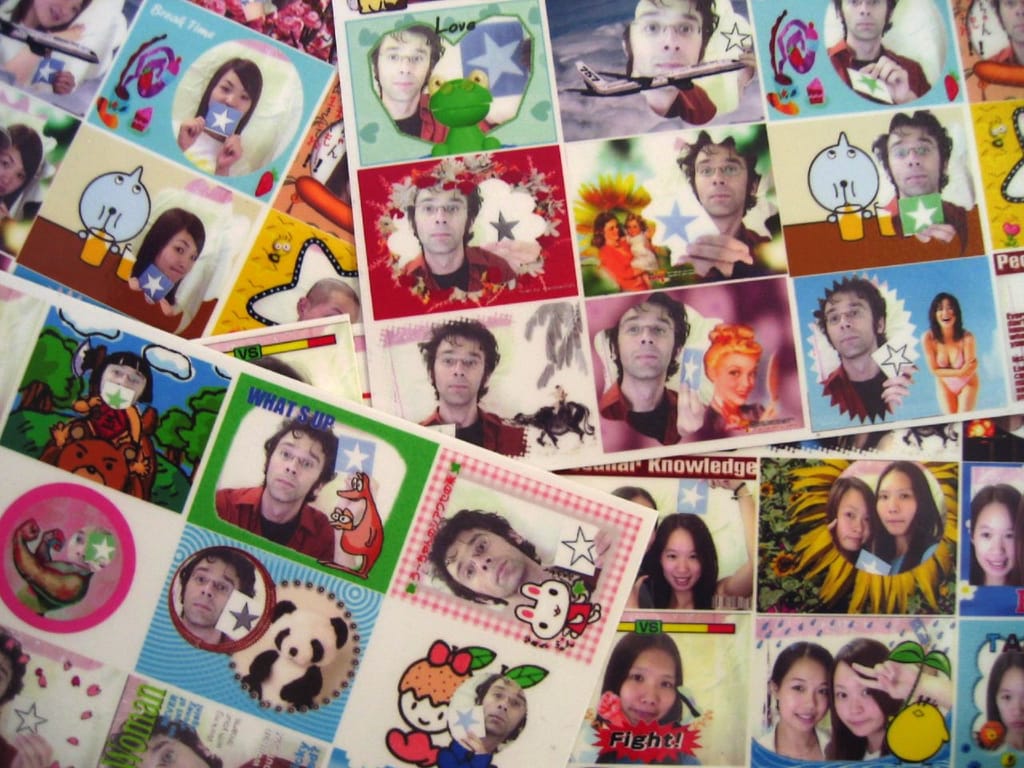
Purikura sticker sheets (caption: testing puri kura for 'superstar' big game, Tokyo)
Kevin Slavin (slavin_fpo), Purikura, 13 August 2005, CC BY 2.0, via Wikimedia Commons. Source: Purikura sticker sheets (caption: testing puri kura for 'superstar' big game, Tokyo) at Wikimedia Commons (from Flickr)

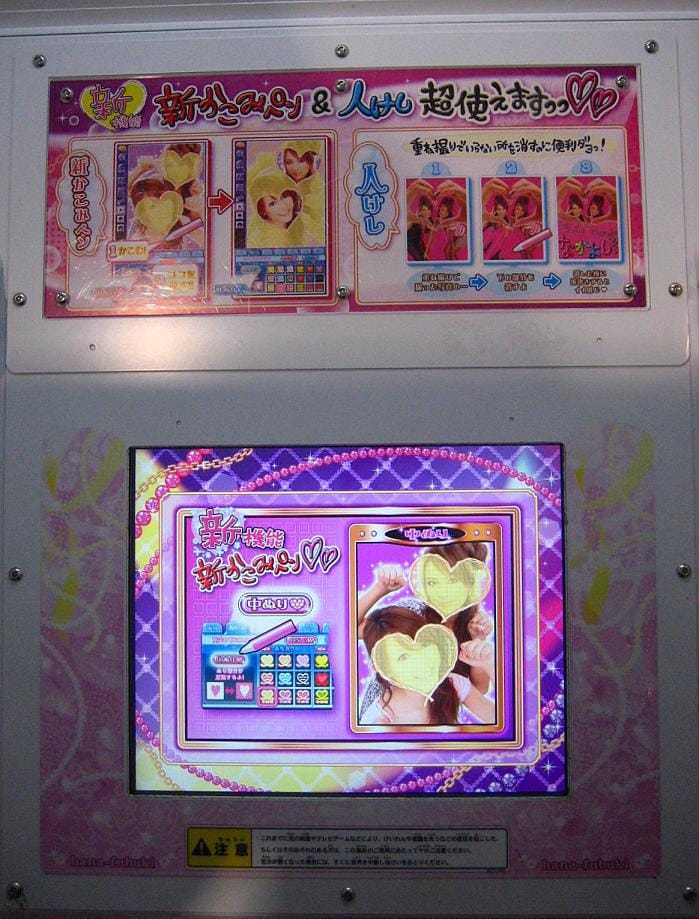
Purikura Pen-Sensitive Screen
Brian Adler, Purikura Pen-Sensitive Screen, 10 July 2007, released into the public domain, via Wikimedia Commons. The pictures and graphics on the machine belong to its maker and are shown only as part of this photograph. Source: Purikura Pen-Sensitive Screen at Wikimedia Commons

Friends crowd into a curtained, brightly lit booth and pose for a short run of automatic exposures, then decorate the chosen pictures on a pen screen with stamps, borders, glitter, drawings and handwritten text. The booth already smooths skin and enlarges eyes in the preview. The result is a sheet of small, saturated, heavily worked sticker portraits that the group cuts up, trades and pastes into notebooks and phone cases.
Built on two systems: Bright selfie and Sweet retouch. What systems are.
Shoot sheet for your kit A prompt for an image model The photographs
How the look is made
- Go in as a group: squeeze into the frame cheek to cheek and give each shot a different heart, V-sign or cute-face gesture.
- Light the faces from every side with the booth's flash and ring light, so shadows vanish and skin reads smooth and bright.
- Frame close and a little above, centred and frontal, with faces filling the small sticker cell.
- Pick your favourite frames, then decorate by hand on the pen screen: stamps, frames, glitter, doodles, dates and names in handwriting.
- Let the retouching show: bigger eyes, smoother skin, brighter colour and a busy, saturated finish are part of the look.
- Print a sheet and share it out: cut the stickers apart, trade them with friends and stick them into notebooks and albums.
Shoot sheet for your kit
Fill in your camera, lenses and lights, and the sheet says which light plays each part, what to work around and where to start on your camera. Without a kit it starts on a full-frame camera.
Light
Key: a flash on the camera, about 25° to the camera’s left, soft.
Fill: a softbox, about 25° to the camera’s right, high, soft.
- Shadowless: big sources close in on both sides (or a light tent, or a white cove) so nothing casts a shadow.
- Shadow edges
- Light from all around, so almost no shadows form even under the chin or behind objects: a white cove, a light tent, a large ring light, fog over snow.
- Shadow depth
- Shadows kept light and full of detail by a reflector, a fill light, bounce or bright surroundings (a low lighting ratio, up to about 3:1: the shadow side at most a stop and a half darker).
How the style is lit
- Booth flash and fill lights around the camera and on the sides, so the face is lit evenly from the front with almost no shadow; the exact hardware varies by machine and is not documented in the sources checked.
- A ring-style frontal light or a large lit panel behind the lens, giving round catchlights in the eyes; this is inferred from the finished photographs, not documented in the sources.
This plan is worked out from the style’s choices, so it is drawn as a schematic. One way to get the light, not a record of how any photograph was lit.
Lens and settings
Start at
On a full-frame camera: the same depth of field and exposure as the style’s own numbers, in the same light. Then meter and adjust.
- The style’s f/5.7 on a small-sensor compact gives about the depth of field of f/32 on full frame.
- Stop down as far as the lens goes, focus a third of the way into the scene, and check the corners.
- Then
- 24–35 mm · f/4–f/8 on a small-sensor compact, inferred from the gear and the look. A reconstruction from the booth's fixed digital camera, its close sitting distance and its all-round flash: a wide-to-normal view, enough depth for a cluster of faces and a short flash exposure. The sources checked do not state the booths' cameras, lenses or exposures, and machines vary by maker and year. Shutter and ISO are not given because no source supports them; the focal length and aperture ranges are likewise unverified.
- White balance
- Balanced to the booth's daylight-like flash so skin reads neutral to rosy; colour is then pushed saturated or pastel in the software, and backgrounds and frames carry the strongest colour.
- Focus
- Everything sharp from the nearest stone to the horizon.
- Distance
- Within arm’s reach: faces, hands and details fill the frame.
- Balance
- The subject in the middle, the frame balanced around it. The subject faces the lens; planes run parallel to the picture.
- Crop & fill
- The edges cut into the subject: heads, limbs or objects run out of frame.
Direct
Sitters crowd shoulder to shoulder in front of a fixed lens and take several shots, changing pose on each countdown: heart hands, V-signs, cheek-to-cheek tilts, cute faces, jumping or leaning in. The group directs itself; the booth's voice and preview prompt the changes.
- Head & gaze
- Looking straight into the camera, so the subject meets the viewer’s eye. The head canted to one side: softer, curious, playful or cute.
- Arms & hands
- Signs made at the camera: the V sign, heart hands, finger hearts, a thumbs-up, pointing at the lens.
- Expression
- Pouts, puffed cheeks, wide eyes, tongues out and other faces pulled for the camera. A smile, posed or natural, lips closed or showing teeth.
- Several people
- Bodies close together, overlapping and leaning in: friends, a band, a family on a sofa.
- The moment
- Ordinary photographs by and for ordinary people, or images that look like them.
- With the sitter
- The subject performs for the camera and shapes the picture.
Style the set
Outfits, hair and make-up are chosen for the booth: school uniforms, matching accessories or dress-up wigs and costumes. After the shoot the pictures themselves are dressed on the pen screen with stamps, borders, glitter, handwriting and clip art, until the frame is crowded and bright.
- Clothes
- Outfits the wearers put together to be seen, designer labels included: layering, sneakers, statement pieces.
- Hair & make-up
- Groomed hair and finished make-up that still look natural: even skin, defined eyes, neat brows.
- Set & props
- A painted, cloth, paper or seamless backdrop behind the subject.
- Look of the styling
- Patterns, objects and textures piled together: pattern on pattern, flowers on brocade.
Finish
- Colour
- Strong, dense colours. Pale, light colours.
- Digital & other
- A modern digital camera: clean, detailed, neutral.
- Post-production
- Several photographs combined into one picture. Words or graphic marks added to the photograph. Marks made by hand on the negative or the print. Perfected skin and surfaces.
- Shown as
- Pictures arranged in a grid for comparison.
Stay away from candid & unobserved, straight print, clean & noiseless, visible grain, deep shadows, black shadows, low-key & chiaroscuro, document & record, objective & scientific, arm’s length & selfie, confrontational and awkward & in-between.
Before you shoot it
These are real people's pictures, and the sitters are often teenagers and young women; the booth is a shared, private ritual, so get every sitter's consent before photographing, posting or reproducing a sheet, and never publish another person's face. The automatic retouching narrows faces and enlarges eyes toward a single beauty template; make skin lightening and face reshaping optional rather than the default. Gyaru and school-uniform looks belong to a living youth subculture in Japan, so treat them as people's own styling, not as a costume. Print Club is the Atlus/Sega trademark, and the characters, frames and stamps on a machine belong to its makers, so do not copy them as your own.
A prompt for an image model
A ready prompt that describes this look to an image model: where the lights stand, the lens, the framing and the colour. It starts on the style’s own choices; change any of them and the prompt and the notes follow.
The prompt
Notes on this prompt
- How the style uses it: light the faces from every side with the booth's flash and ring light, so shadows vanish and skin reads smooth and bright. Image models put the light in the wrong place more often than anything else, so the prompt says where each light stands: which side of the picture, and how high. Keep to one light pattern per prompt, or the model splits the difference.
- Describe an invented person by age, clothes and pose. Never name a real or famous person, and never write “looks like”.
- Heavy retouching: ask for smooth skin that keeps its pores, or the model makes it look like plastic.
The model makes a new picture, not a photograph of anything that happened. Label it as AI-generated, and don’t pass it off as the style’s history or as a real person.
Photographs that define it
From open collections, shown whole with their credits. Later photographs are linked, not shown, while they are in copyright.
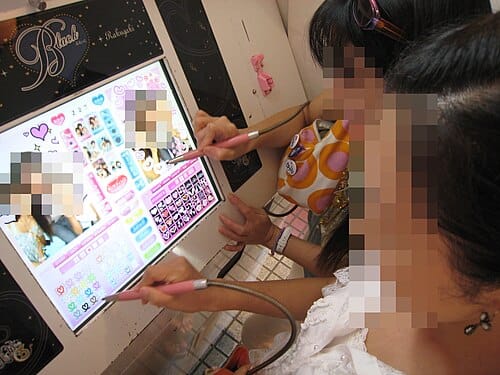
August 2007, Purikura post-editing in Osaka
Syced, August 2007, Purikura post-editing in Osaka, CC0 1.0, via Wikimedia Commons. Source: August 2007, Purikura post-editing in Osaka at Wikimedia Commons

With other styles
The opposite: Korean four-cut photo booth (classic frontal strip). Keep the booth and the friends but trade the plain frame and the four-pose strip for a heavily decorated, retouched sheet of many small stickers; the decoration is what makes it purikura.
Pairs with Meitu beauty-app selfie. Both smooth skin and enlarge eyes; borrow the soft pastel retouch, but keep the shared booth, group pose and the stamps-and-doodles overlay that a solo beauty-app selfie lacks.
The opposite: Girly photo (onnanoko shashin). Girly photo records private life on film with flash glare and grain; purikura turns the same friend-group energy into a shadowless, retouched, decorated sticker.
Pairs with Y2K digicam and flash revival. Both are bright, friend-filled and flash-lit; mix the digicam's hard flash into a purikura frame, or add sticker doodles on top of a digicam group photo.
Sources
- Wikipedia, 'Purikura' (CC BY-SA 4.0), https://en.wikipedia.org/wiki/Purikura: Sasaki Miho's 1994 idea, the February 1995 Print Club launch, rival booths in 1996 and 1997, spread across Asia, booth workflow (shoot, pick, decorate on a pen screen, preview retouching, a glossy sheet shared by the group; the 10 by 15 cm size and the spread to Australia are stated for photo-sticker booths in general).
- The Standard Japan, 'Purikura: What It Means and How Japan's Photo Booths Work', https://thestandardjapan.com/culture/purikura-guide: preview retouching of eyes, skin and face shape; decoration with drawings, stamps, text and frames; sticker sheets cut up and shared; app and QR copies; 1995 Sega and Atlus launch.
- Wikimedia Commons, Category: Purikura, https://commons.wikimedia.org/wiki/Category:Purikura: file pages for the specimens, with their licences (Purikura.jpg CC BY 2.0; August 2007 Purikura post-editing in Osaka CC0; Purikura Pen-Sensitive Screen public domain).
- Research limit: no booth camera model, lighting hardware or exposure was found in the sources checked, so the lighting and settings above are inferred.