Styles / Staged & conceptual
Art photomicrography
- Key: a softbox, about 40° to the camera’s left, high, soft.
- Rim or hair light: a spot or bare head, from behind, to the camera’s right, hard.
Key high: about 30–45° above eye level, angled down. No reflector or fill: let the shadows fall to black.
Schematic, not to scale: worked out from the style’s choices. No set-up of this style has been rendered yet.
The photographs that define it are still in copyright, so they are linked below rather than shown.
Crystals and other tiny things photographed through a light microscope until they fill the frame as colour and pattern, with no scale, horizon or ground to show size. Polarised light gives saturated interference colours, usually on black; darkfield and fluorescence work alike but are not shown by the specimens here. Chosen for beauty as much as information, shown large, with a caption naming technique, objective and magnification.
Built on two systems: Macro on black and Graphic abstraction. What systems are.
How the look is made
- Choose a specimen for its pattern, not its identity: a crystal growth, a cell sheet or a fibre bundle that reads as drawing and colour at 4x to 20x.
- Pick the contrast method that makes the colour: polarised light with crossed filters for birefringent crystals, darkfield for pale edges on black, fluorescence for glowing labelled structures.
- Fill the frame edge to edge, or float one form in a black field; leave out slide edges, labels and anything that shows scale.
- Stack focus planes and clean the slide of dust and bubbles, so surfaces are sharp from front to back.
- Set exposure for the brightest interference colours and let the rest go dark; keep the colour saturated and decide whether any false colour or channel mapping is acknowledged in the caption.
- State the technique, objective and magnification in the caption, and keep retouching to cleaning, so the picture stays a record as well as a design.
Shoot sheet for your kit
Fill in your camera, lenses and lights, and the sheet says which light plays each part, what to work around and where to start on your camera. Without a kit it starts on a full-frame camera.
Light
Key: a softbox, about 40° to the camera’s left, high, soft.
Rim or hair light: a spot or bare head, from behind, to the camera’s right, hard.
- Key high: about 30–45° above eye level, angled down.
- No reflector or fill: let the shadows fall to black.
- Shadow depth
- Dark shadows that still hold some detail (a high lighting ratio, about 4:1 to 8:1: the shadow side two to three stops darker). Shadows with no fill at all that fall to pure black with no detail, so parts of the subject disappear.
How the style is lit
- Transmitted light through crossed polarising filters on a prepared slide, giving interference colours on a black ground.
- Darkfield condenser: oblique light that never enters the objective, so only the specimen's edges shine against black.
- Epi-fluorescence: excitation light and emission filters, so stained structures glow on a dark field.
This plan is worked out from the style’s choices, so it is drawn as a schematic. One way to get the light, not a record of how any photograph was lit.
Lens and settings
Start at
On a full-frame camera: the same depth of field and exposure as the style’s own numbers, in the same light. Then meter and adjust.
- The style’s f/8 on APS-C gives about the depth of field of f/12 on full frame.
- Then
- 1/500–1/8 s · ISO 100–200 on APS-C, inferred from the gear and the look. Inferred from the EXIF data of three openly licensed polarised-light micrographs (1/500 s, 1/80 s and 1/8 s at ISO 100); no aperture or focal length applies, because the microscope objective and its numerical aperture replace the camera lens. Exposure follows the light source and objective, and long times suit a still bench. In the genome, light.gels stands in for polarised, darkfield or fluorescence colour (nothing is gelled) and optics.macro stands in for the very close focus of a microscope objective.
- White balance
- Set neutral for the microscope lamp, with polarised and fluorescence colours kept as they come; blacks stay black and no warm room light reaches the field.
- Focal length
- Very close focus: small things at life size or larger.
- Focus
- Everything sharp from the nearest stone to the horizon.
- Distance
- Within arm’s reach: faces, hands and details fill the frame.
- The photographer
- Shot from the hip, hidden or unnoticed.
- Crop & fill
- Detail runs to every edge with no single centre.
- Depth
- Depth collapsed into pattern and flat shapes.
- Duration
- An unmoving scene, exposed slowly and carefully.
Direct
Nobody in the picture.
- Without a pose
- No people at all, or people so small or far off that their pose does not read (hands alone are Hands alone).
- The set-up
- Sets, models and miniatures built to be photographed.
Style the set
The slide is prepared and cleaned (for crystals, a solution is dried or recrystallised on glass), then the field of view is selected; nothing is dressed or labelled in the frame, and the black or coloured ground is the one controlled element.
- How much is styled
- Nothing dressed, made up, moved or added for the picture.
Finish
- Colour
- Strong, dense colours.
- Digital & other
- A modern digital camera: clean, detailed, neutral.
- Post-production
- Several photographs combined into one picture.
- Shown in
- Large prints on the wall, like paintings.
Stay away from portrait, golden hour, overcast & flat daylight, wide angle, black & white, full range, faded & matte, visible grain, filter & preset look, snapshot and candid & unobserved.
A prompt for an image model
A ready prompt that describes this look to an image model: where the lights stand, the lens, the framing and the colour. It starts on the style’s own choices; change any of them and the prompt and the notes follow.
The prompt
Notes on this prompt
- How the style uses it: pick the contrast method that makes the colour: polarised light with crossed filters for birefringent crystals, darkfield for pale edges on black, fluorescence for glowing labelled structures. Image models put the light in the wrong place more often than anything else, so the prompt says where each light stands: which side of the picture, and how high. Keep to one light pattern per prompt, or the model splits the difference.
The model makes a new picture, not a photograph of anything that happened. Label it as AI-generated, and don’t pass it off as the style’s history or as a real person.
Made by an AI model
An image gpt-image-2 made from this style’s choices, then checked against them by a vision model. Not a photograph, and not part of the style’s history. All generated images
-
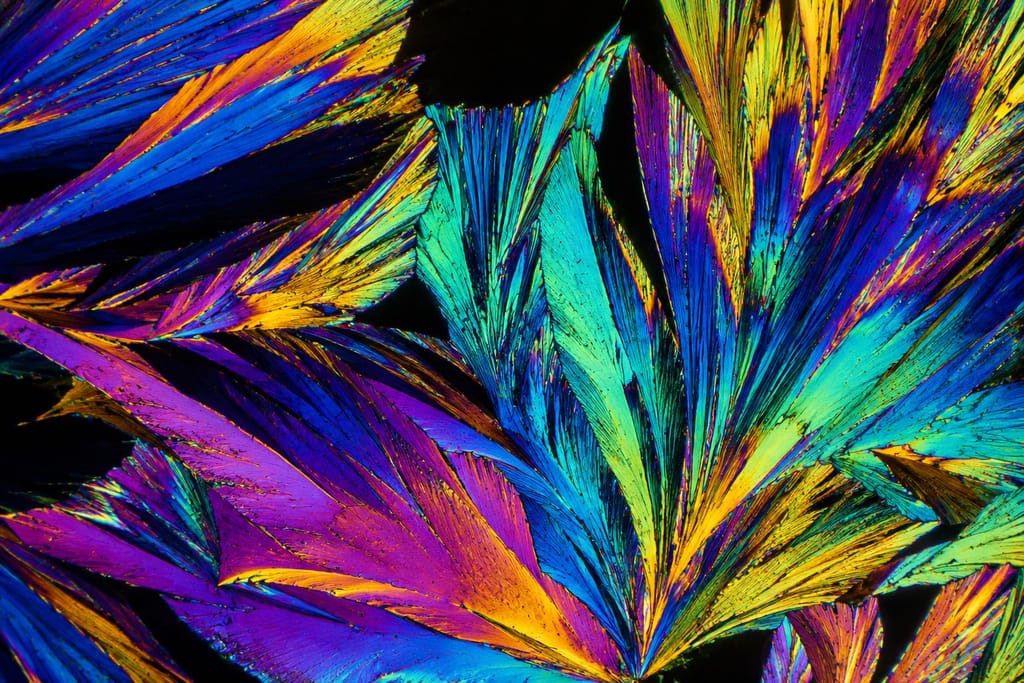
Overlapping, featherlike crystalline forms fill the image with streaks of vivid blue, turquoise, purple, yellow and orange against black gaps. Fine ridges run along the angular forms, resembling crystals viewed through a polarized-light microscope. What the check saw. The image resembles an abstract polarized-light photomicrograph, with sharply resolved textures and intense rainbow colours.
With other styles
Pairs with Focus-stacked natural-history macro. Share the stacking method and a still bench, but this look takes its colour from polarised, darkfield or fluorescence light on a microscope rather than soft studio light on a whole specimen.
The opposite: Dark-field glass still life. Both put bright edges on black, but glass still life lights a visible object at table scale; here the subject is microscopic and the colour comes from interference.
The opposite: Natural-object scanography. Both flatten natural objects into a field of detail, but scanography records reflected colour from glass, while this look uses transmitted, polarised or fluorescent light through a microscope.
Pairs with Hubble palette narrowband astrophotography. Both are saturated images of the unseeable with colour decided by method; keep that choice stated in the caption.