Styles / Staged & conceptual
Light painting photography
- Key: a softbox, about 40° to the camera’s left, high, soft.
- Black flag: a black card, about 60° to the camera’s right, soft.
Key high: about 30–45° above eye level, angled down. No fill: a black card on the shadow side keeps the shadows dark (negative fill).
Schematic, not to scale: worked out from the style’s choices. No set-up of this style has been rendered yet.
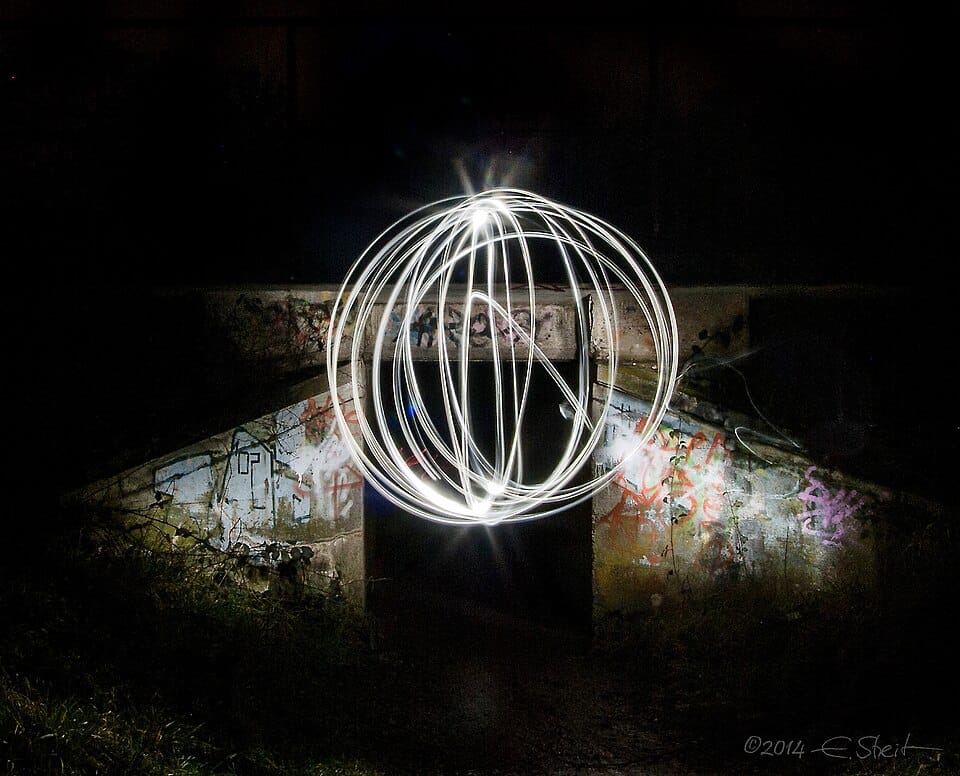
04/52 fast spinning orb, guarding the entrance
Ekkehard Streit, 04/52 fast spinning orb, guarding the entrance, 22 January 2014. Creator's Flickr photograph, via Wikimedia Commons, CC BY 2.0; licence checked by the Commons Flickr-review bot on 27 January 2014. Source: 04/52 fast spinning orb, guarding the entrance at Wikimedia Commons, from the photographer's Flickr account

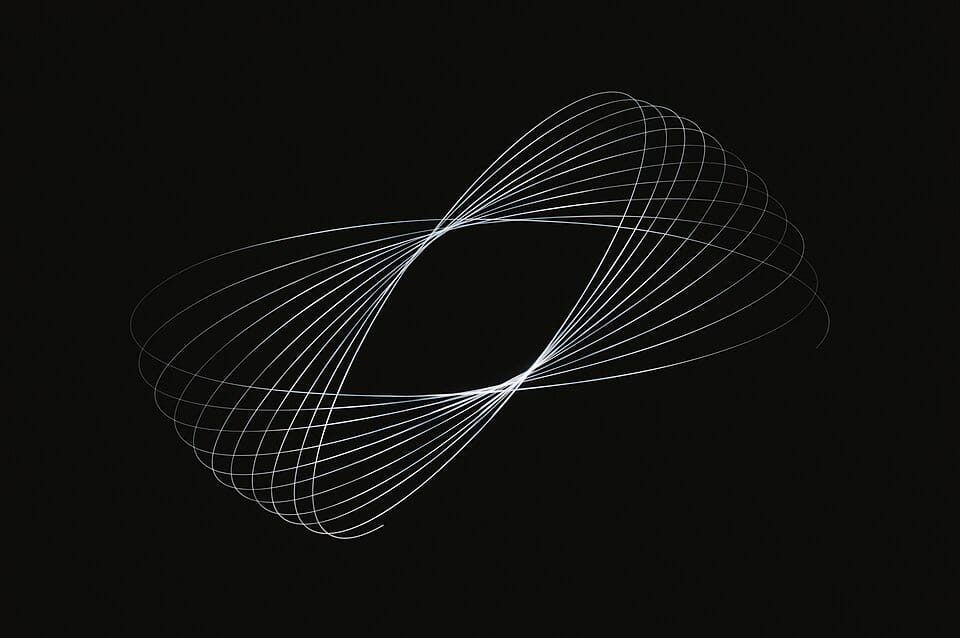
A bow tie shape created using light painting
Subhrajyoti07, A bow tie shape created using light painting, 23 February 2018, Kolkata, India. Photographer's own work, via Wikimedia Commons, CC BY-SA 4.0. Source: A bow tie shape created using light painting at Wikimedia Commons, photographer's own work

Keep the camera still and move a small light through a dark scene during a long exposure. Its path becomes a continuous luminous drawing: a handwritten gesture, a revolving orb or a pendulum's repeated loops. A performer may disappear into the shadows or remain visible behind the marks. Unlike a nightscape, the light is deliberately made into the subject; unlike ICM, the camera need not move and the background can stay legible.
Built on two systems: Graphic abstraction and Macro on black. What systems are.
Shoot sheet for your kit A prompt for an image model The photographs
How the look is made
- Fix the camera and compose a dark field before opening the shutter; give the planned light drawing enough room to remain legible.
- Move a small continuous light through the frame while the shutter stays open, building the image with its path rather than adding strokes afterwards.
- Rehearse a simple gesture, revolving loop or pendulum pattern, and vary the movement deliberately instead of merely recording passing traffic or stars.
- Keep ambient illumination low enough that the trails separate from their surroundings; allow the operator to disappear or show a deliberately lit participant behind the drawing.
- Choose whether the drawing floats against black or answers a recognisable location; keep environmental detail subordinate rather than dissolving the entire frame with camera movement.
- Distinguish a single long exposure from layered captures or added graphics in the caption; retain control of trail brightness without pretending that every luminous line must preserve internal texture.
Shoot sheet for your kit
Fill in your camera, lenses and lights, and the sheet says which light plays each part, what to work around and where to start on your camera. Without a kit it starts on a full-frame camera.
Light
Key: a softbox, about 40° to the camera’s left, high, soft.
Black flag: a black card, about 60° to the camera’s right, soft.
- Key high: about 30–45° above eye level, angled down.
- No fill: a black card on the shadow side keeps the shadows dark (negative fill).
- Shadow depth
- Shadows with no fill at all that fall to pure black with no detail, so parts of the subject disappear. Dark shadows that still hold some detail (a high lighting ratio, about 4:1 to 8:1: the shadow side two to three stops darker).
How the style is lit
- In a dark room or an unlit location, move a small continuous lamp facing the camera through a rehearsed path during the exposure; let the surroundings and operator fall into deep shadow while the path registers as a bright line.
- Suspend a small LED as a pendulum in a dark room and set it moving elliptically in front of a fixed camera; the accumulating white curves form the image without a lit sitter or visible set.
- For the portrait variant, keep the room dark, use brief strobe illumination to register the consenting adult participant, and move a continuous light or fibre-optic source around the figure during the longer open-shutter interval; control the trails and figure exposure separately.
This plan is worked out from the style’s choices, so it is drawn as a schematic. One way to get the light, not a record of how any photograph was lit.
Lens and settings
Start at
On a full-frame camera: the same depth of field and exposure as the style’s own numbers, in the same light. Then meter and adjust.
- The style’s f/18 on APS-C gives about the depth of field of f/27 on full frame.
- Stop down as far as the lens goes, focus a third of the way into the scene, and check the corners.
- 30 s: on a tripod.
- Then
- 27 mm · f/16–f/20 · 22–25 s · ISO 100 on APS-C, documented. A narrow, documented starting bracket from the two born-digital specimens, not a universal exposure prescription: both report 18 mm actual focal length and 27 mm full-frame equivalent; the orb records f/20, 25 s, ISO 100 and the pendulum f/16, 22 s, ISO 100. Apertures are for APS-C; historical exposures and the contemporary portrait tutorial's numerical settings were not confirmed. Adjust duration to the movement and aperture to lamp brightness.
- White balance
- Use a consistent balance for the chosen lamp, preserving deliberate light colour; the white-light specimens establish no mandatory warm or cool cast.
- Focal length
- A wide view; near things loom and lines stretch towards the edges.
- Distance
- Whole figures and their immediate surroundings.
- Balance
- The subject in the middle, the frame balanced around it.
- Crop & fill
- A small subject in a large empty field.
- Duration
- Seconds or more: water turns to mist, lights become trails. Moving things smeared across the frame.
- Many times
- Moving lights drawn into a long exposure.
Direct
The operator can remain unregistered in darkness, leaving no visible figure. If included, a consenting adult participant deliberately reaches, draws or handles the light; allow a blurred body behind the gesture, or use brief illumination to register a clearer figure rather than requiring a fixed facial expression.
- Without a pose
- No people at all, or people so small or far off that their pose does not read (hands alone are Hands alone).
- The set-up
- A scene staged and directed like a film still or a painting.
Style the set
Keep the visible scene spare: either an empty dark field or a chosen existing location that supports the drawing. The light path is the added element, not a digitally pasted graphic; avoid copying an existing performer's recognisable drawing, costume or portrait arrangement.
- Look of the styling
- Few, simple elements on clean surfaces, with space around them.
Finish
- Monochrome
- Rich blacks, clean whites and every grey between.
- Colour
- White balanced to the light, so whites stay white and skin, food and products keep their real colour, with no overall cast.
- Digital & other
- A modern digital camera: clean, detailed, neutral.
- Texture
- Smooth tones with no visible grain.
- Shown as
- Each picture stands on its own.
Stay away from snapshot, panning, high-key, hard, direct sun, text & graphics on the image and rendered & cgi.
Before you shoot it
This is a shared exposure method, not permission to reproduce a living practitioner's signature drawings, named series or portrait designs. Credit the makers and light performers, obtain consent for identifiable participants, and respect each file's licence; the historical self-portrait remains link-only. Work only with site permission and a clear movement area; this entry's practical instructions use electric lights, not burning steel wool, open flame or lasers directed towards people or cameras.
A prompt for an image model
A ready prompt that describes this look to an image model: where the lights stand, the lens, the framing and the colour. It starts on the style’s own choices; change any of them and the prompt and the notes follow.
The prompt
Notes on this prompt
- How the style uses it: fix the camera and compose a dark field before opening the shutter; give the planned light drawing enough room to remain legible. Image models put the light in the wrong place more often than anything else, so the prompt says where each light stands: which side of the picture, and how high. Keep to one light pattern per prompt, or the model splits the difference.
- Black and white: colour words in the subject (a red dress, green leaves) can pull the model back to colour, so leave them out.
- Blur needs a cause: say what moves, and that the exposure is long enough to smear it.
The model makes a new picture, not a photograph of anything that happened. Label it as AI-generated, and don’t pass it off as the style’s history or as a real person.
Where to see it
From open collections, shown whole with their credits. Later photographs are linked, not shown, while they are in copyright.
In copyright, so linked
- Space Writing (Self-Portrait) , Man Ray, 1935. Bowdoin College Museum of Art.
Made by an AI model
An image gpt-image-2 made from this style’s choices, then checked against them by a vision model. Not a photograph, and not part of the style’s history. All generated images
-
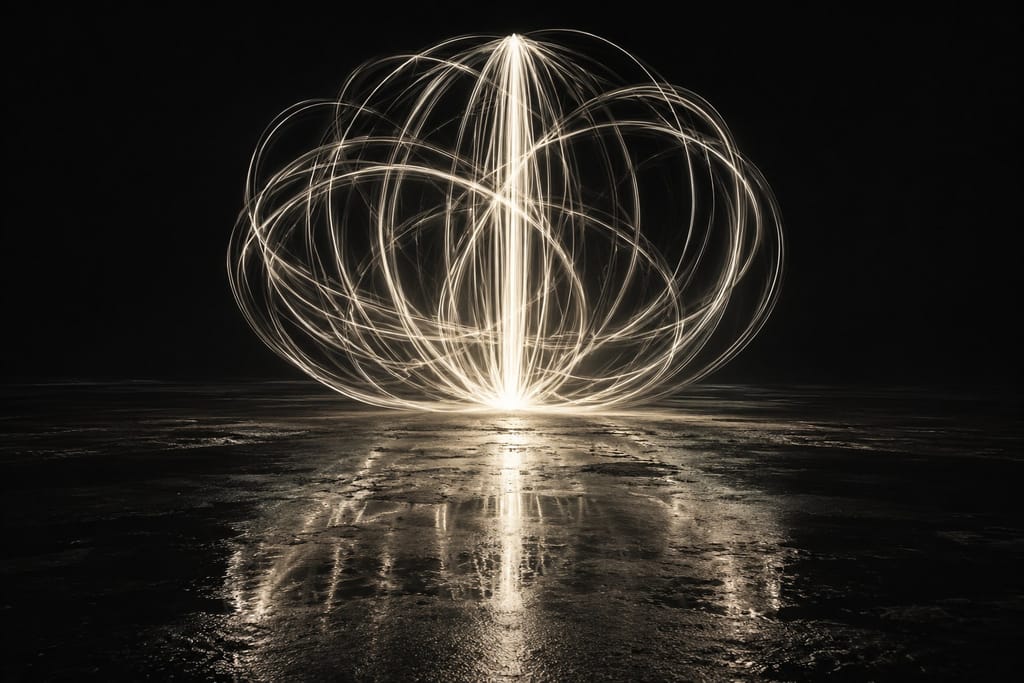
Looping cream-white light trails form a large spherical shape against a black background, converging along a bright vertical centre. The light reflects across a wet, textured ground beneath it. What the check saw. The image resembles a long-exposure light-painting photograph, with a centred luminous orb and its reflection standing out against deep darkness.
With other styles
The opposite: Milky Way nightscape photography. Use a stable camera and duration in both, but make a deliberately moved lamp the principal subject rather than treating the sky and terrestrial foreground as the picture.
The opposite: Contemporary ICM landscape abstraction. Keep the camera and background stable while the lamp moves; do not replace deliberate light drawing with a sweep that smears the whole existing landscape.
Pairs with Surrealist photography. Make an ordinary room strange through an in-camera luminous gesture, without requiring solarisation, montage or a copy of a historical artist's self-portrait.
Sources
- Andrea Rosen, curator, Man Ray, Space Writing (Self-Portrait), 1935, Bowdoin College Museum of Art: https://research.bowdoin.edu/surrealist-photography/2014/02/06/man-ray-space-writing-self-portrait-1935/ (curatorial description of penlight drawing during a prolonged exposure, studio context, gelatin silver print, accession 1987.15 and explicit rights notice; full text retrieved through the site's WordPress API).
- LIFE, Behind the Picture: Picasso Draws With Light: https://www.life.com/arts-entertainment/behind-the-picture-picasso-draws-with-light/ (publisher's account of Gjon Mili's 1949 southern-France sessions, small electric light, open shutters and strobe illumination in the series; not evidence of an exact shutter duration).
- Ekkehard Streit, 04/52 fast spinning orb, guarding the entrance: https://commons.wikimedia.org/wiki/File:04-52_fast_spinning_orb,_guarding_the_entrance_(12137061834).jpg (22 January 2014, creator attribution, Flickr-reviewed CC BY 2.0; Commons imageinfo metadata records Nikon D80, 18 mm/27 mm equivalent, f/20, 25 s and ISO 100; exact location not established).
- Subhrajyoti07, A bow tie shape created using light painting: https://commons.wikimedia.org/wiki/File:A_bow_tie_shape_created_using_light_painting.jpg (own-work CC BY-SA 4.0, 23 February 2018, Kolkata quality-image category and coordinates, explicit single-LED pendulum method; imageinfo metadata records Nikon D3200, 18 mm/27 mm equivalent, f/16, 22 s and ISO 100).
- Jason D. Page, Dreamy Fiber Optic Light Painting Portrait Tutorial, 9 June 2026: https://lightpaintingphotography.com/light-painting-photography/dreamy-fiber-optic-light-painting-portrait-tutorial/ (first-party contemporary method: moving fibre-optic light, long exposure and strobes to register the participant; no numerical camera settings confirmed).
- Jason D. Page, The Art of Light Painting Book, 6 October 2026: https://lightpaintingphotography.com/light-painting-photography/the-art-of-light-painting-book/ (first-party evidence that the named practice remains active; a commercial announcement, not independent historical proof).