Styles / Digital & social
Tiny-planet photographic panoramas
- Key: the sun, about 45° to the camera’s left, high, hard.
Key high: about 30–45° above eye level, angled down.
Schematic, not to scale: worked out from the style’s choices. No set-up of this style has been rendered yet.
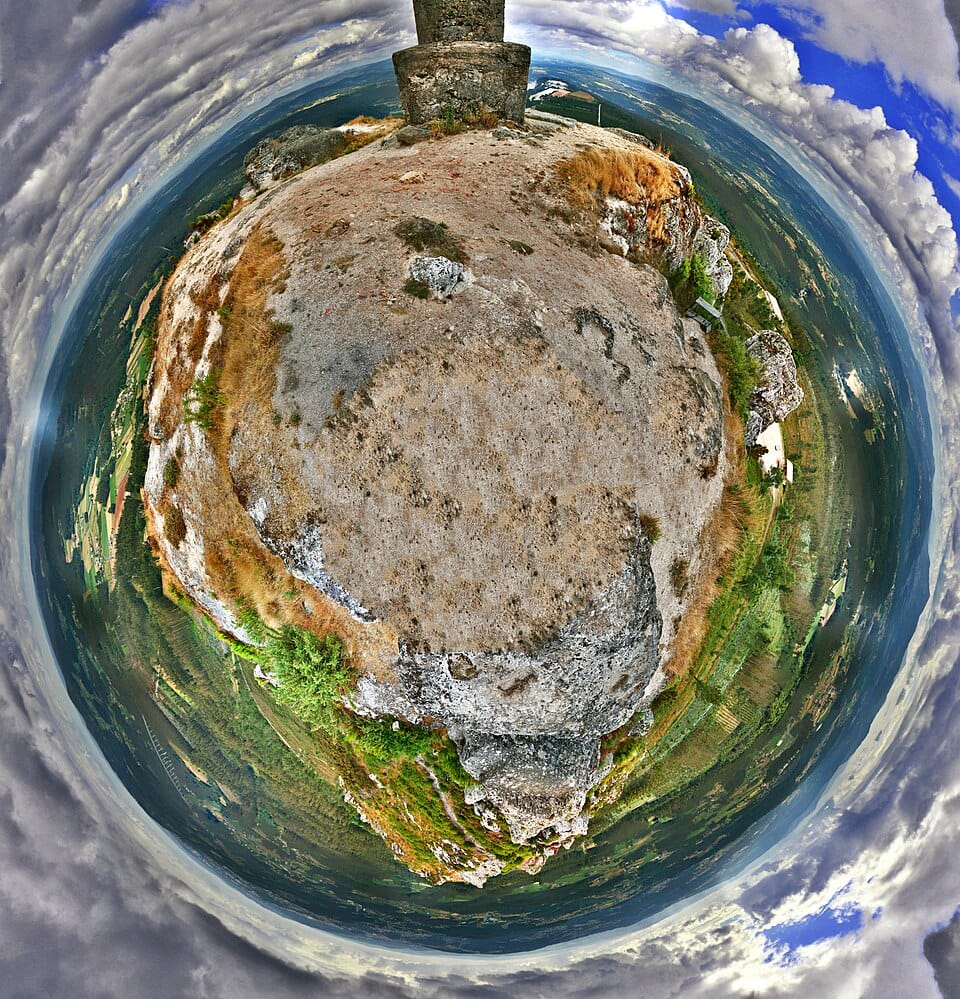
Pico Sacro - 02 - Panorama polar
Xosema, Pico Sacro - 02 - Panorama polar, 2011, Wikimedia Commons, CC BY-SA 3.0. Source: Pico Sacro - 02 - Panorama polar at Wikimedia Commons

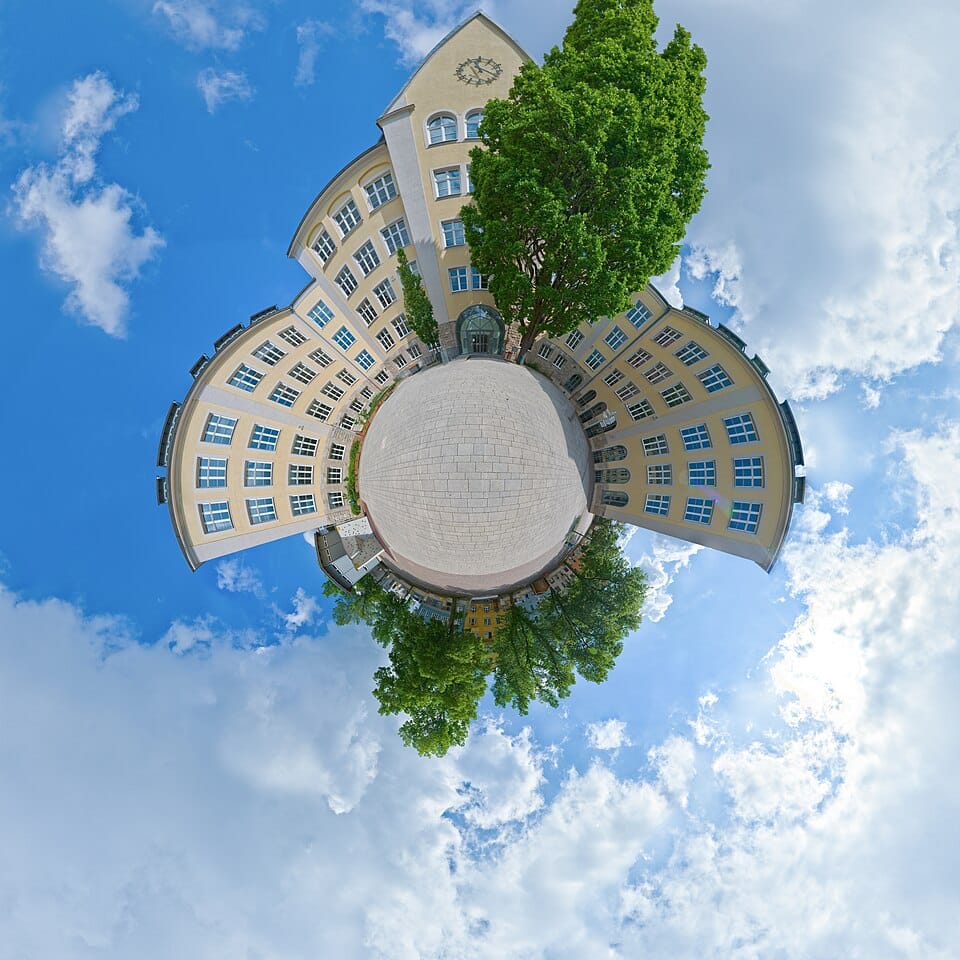
Panorama des Schiller-Gymnasiums Hof (little planet)
PantheraLeo1359531, Panorama des Schiller-Gymnasiums Hof (LITTLE PLANET), 2024, Wikimedia Commons, CC BY-SA 4.0. Source: Panorama des Schiller-Gymnasiums Hof (little planet) at Wikimedia Commons

Photograph a full 360 by 180 degree sphere of one place, then reproject it stereographically so the ground curls into a small globe, buildings and trees radiate from its rim and the sky fills the rest of the square. The land sits at the centre, sharp from near to far, and the horizon becomes a circle. The look comes from a repeatable capture-stitch-project workflow, not from a lens effect, a drone's nadir view or a dream tableau.
Built mostly on one system: Cinematic colour. What systems are.
Shoot sheet for your kit A prompt for an image model The photographs
How the look is made
- Choose a place with strong upright structure all round, such as a courtyard, a summit, a square or a row of trees, because every vertical will radiate outward from the globe's rim. Both ground-level courtyards and raised summit or aerial vantage points are normal.
- Shoot the whole sphere from one fixed point with overlapping frames, keeping the camera still and rotating around its lens so the stitch has no parallax seams.
- Stop down and focus far enough that near ground and distant buildings are both sharp; the projected world must stay legible at its edge.
- Reproject the stitched panorama stereographically, then set the planet's radius, rotation and height so the globe sits at the centre of the square, with the sky as the surrounding field.
- Clean the stitch, nadir hole and tone by hand, and place sun and cloud so the sky meets the rim with visible colour contrast; keep people and moving cars out or tiny.
Shoot sheet for your kit
Fill in your camera, lenses and lights, and the sheet says which light plays each part, what to work around and where to start on your camera. Without a kit it starts on a full-frame camera.
Light
Key: the sun, about 45° to the camera’s left, high, hard.
- Key high: about 30–45° above eye level, angled down.
- Highlights
- Even the brightest parts (clouds, white cloth, snow) keep texture and detail.
How the style is lit
- Open daylight with a clear or broken sky, taken in a short bracketed series because the sun, the shaded ground and the bright clouds all sit in one 360 degree view; the sun is usually hidden behind a tree or building or placed deliberately at the rim.
- Even overcast or twilight light when the sky must wrap smoothly around the globe without a hot spot and no single side of the world is brighter than the rest.
This plan is worked out from the style’s choices, so it is drawn as a schematic. One way to get the light, not a record of how any photograph was lit.
Lens and settings
Start at
On a full-frame camera: the same depth of field and exposure as the style’s own numbers, in the same light. Then meter and adjust.
- Then
- 8–16 mm · f/8–f/11 · 1/250–1/60 s · ISO 100–400 on full frame, inferred from the gear and the look. Inferred from the documented workflow: a 180 to 185 degree fisheye on an SLR with three frames rotated 120 degrees, or 25 or more overlapping frames from a mirrorless camera. The numbers are a planning range for sharp, evenly exposed frames, not a figure any source states; a fixed manual exposure and white balance across all frames avoids visible seams, and bracketing widens the shutter range.
- Focal length
- A wide view; near things loom and lines stretch towards the edges.
- Focus
- Everything sharp from the nearest stone to the horizon.
- Angle
- The camera at the height of a standing person or of the subject. Looking down on the subject.
- Balance
- The subject in the middle, the frame balanced around it.
- Crop & fill
- The subject shown small within its setting, which explains it.
- Instant
- Movement stopped dead by a fast shutter or flash.
Direct
Nobody in the picture.
- Without a pose
- No people at all, or people so small or far off that their pose does not read (hands alone are Hands alone).
Style the set
Leave the place as found, chosen for its architecture and trees; remove only stitching errors, tripod legs and shadows of the camera. The globe's centre (the nadir) is often retouched, cloned or filled with paving, grass or water.
- Set & props
- A real place picked for its look as the setting for a shoot, not the subjects’ own: a street, a field, a palace, a hotel room.
- How much is styled
- Nothing dressed, made up, moved or added for the picture.
Finish
- Colour
- Strong, dense colours.
- Digital & other
- A modern digital camera: clean, detailed, neutral.
- Texture
- Every surface resolved, more than the eye would see. Smooth tones with no visible grain.
- Post-production
- Several photographs combined into one picture. Shadows and highlights both opened up, with a processed look.
- Shown as
- Each picture stands on its own.
- Shown in
- Pictures made for a scrolling feed.
- Frame
- A square frame.
Stay away from horizon as divider, shallow depth of field, fisheye, corrected perspective, soft focus & diffusion, low angle, motion blur, high-contrast black & white, cameraless, rendered & cgi and visible grain.
Before you shoot it
Whole-sphere captures take in everything around the camera, including passers-by, car number plates, windows into homes and private grounds; stitch from an empty or public spot, blur or remove identifiable people and plates, and respect land access, flight rules and sacred or protected sites. Credit living makers (Paul Bourke, Joel Conroy and others) and do not copy an individual composition. A summit with a religious marker, such as Pico Sacro in Galicia (a legendary pilgrimage hill with a cross on top), is a place to treat respectfully, not just a landscape.
A prompt for an image model
A ready prompt that describes this look to an image model: where the lights stand, the lens, the framing and the colour. It starts on the style’s own choices; change any of them and the prompt and the notes follow.
The prompt
Notes on this prompt
- How the style uses it: clean the stitch, nadir hole and tone by hand, and place sun and cloud so the sky meets the rim with visible colour contrast; keep people and moving cars out or tiny. Image models put the light in the wrong place more often than anything else, so the prompt says where each light stands: which side of the picture, and how high. Keep to one light pattern per prompt, or the model splits the difference.
- Give the camera height in plain words: from knee height looking up, from a stepladder looking down, straight down onto the table.
The model makes a new picture, not a photograph of anything that happened. Label it as AI-generated, and don’t pass it off as the style’s history or as a real person.
Photographs that define it
From open collections, shown whole with their credits. Later photographs are linked, not shown, while they are in copyright.
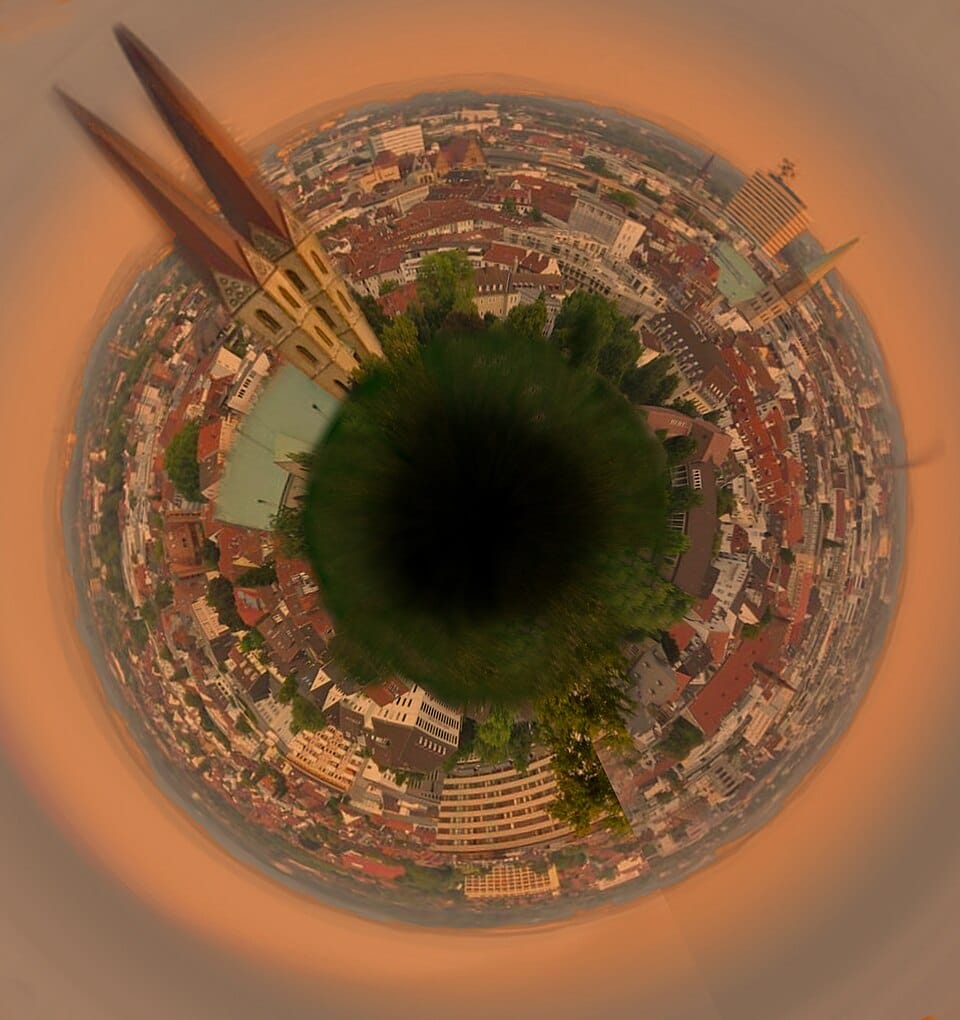
Planet Bielefeld
TUBS, Planet Bielefeld, 2009, Wikimedia Commons, CC BY-SA 3.0. Source: Planet Bielefeld at Wikimedia Commons

With other styles
The opposite: Drone top-down photography. Both turn ground into a pattern, but the drone picture is flat, horizonless and pointed straight down; here the same ground curls into a globe with upright buildings and a sky around it.
The opposite: Surrealist photography. Both look uncanny, but surrealist pictures stage encounters or darkroom effects; here the strangeness is a coherent geometric remapping of a real place that anyone can repeat.
Pairs with Real-estate HDR and flambient interiors. Borrow its exposure blending to hold bright sky and shaded ground together across the whole sphere, but keep the colour natural and the finish clean.
The opposite: Modernist architectural photography. Both can photograph buildings sharply in daylight, but modernist architecture keeps verticals upright in a rectilinear frame; here the whole surround is bent into a globe and the verticals radiate from it.
Sources
- Paul Bourke, Little Planet and stereographic projection examples, University of Western Australia: https://paulbourke.org/panorama/littleplanet/ (fetched: a June 2006 section and a May 2011 'making of' section; 185 degree fisheye on an SLR, three frames rotated 120 degrees, stitched to a spherical panorama and projected with the sphere2stereo tool; no image licence stated).
- Lil' Planets, About: https://lilplanets.com/pages/about (fetched: Joel Conroy, practice since 2012; drone or mirrorless camera on a panoramic head, 25 or more overlapping images, stitched to 360 degrees, stereographic conversion, Photoshop corrections, 6 to 10 hours per image).
- Scout-brief lead not confirmed: B&H Explora, The Travel Series: Making Stereographic Projections with Michael James Murray (page returned HTTP 403), so it is not listed as an exemplar.
- Wikimedia Commons files Planet Bielefeld.jpg (CC BY-SA 3.0, TUBS, 2009), Pico Sacro - 02 - Panorama polar.jpg (CC BY-SA 3.0, Xosema, 2011-07-05) and Panorama des Schiller-Gymnasiums Hof 20240520 (LITTLE PLANET).jpg (CC BY-SA 4.0, PantheraLeo1359531, 2024-05-20): licences and dates from the Commons API; the images were downloaded and inspected.
- Research boundary: only photographic input is included, not wholly rendered planets; the finished image is not labelled optics.fisheye even where a fisheye supplied the frames. Parent and influences are empty because no direct lineage was verified.